How to Install and Activate the Printer for WooCommerce Plugin
To start using the Printer for WooCommerce plugin, follow these steps:
1. Download and Upload the Plugin:
First, download the Printer for WooCommerce plugin from the mail/onedrive/disk.
Log in to your WordPress dashboard.
Go to Plugins -> Add New.
Click on Upload Plugin, and select the file you just downloaded. Then click Install Now.
2. Activate WooCommerce:
Before activating Printer for WooCommerce, make sure the WooCommerce plugin is activated on your site.
If WooCommerce is not already activated, go to Plugins -> Installed Plugins and click Activate under WooCommerce.
3. Activate Printer for WooCommerce:
Once WooCommerce is activated, you can activate the Printer for WooCommerce plugin.
Go back to Plugins -> Installed Plugins, and click Activate under Printer for WooCommerce.
4. Configure Printer for WooCommerce:
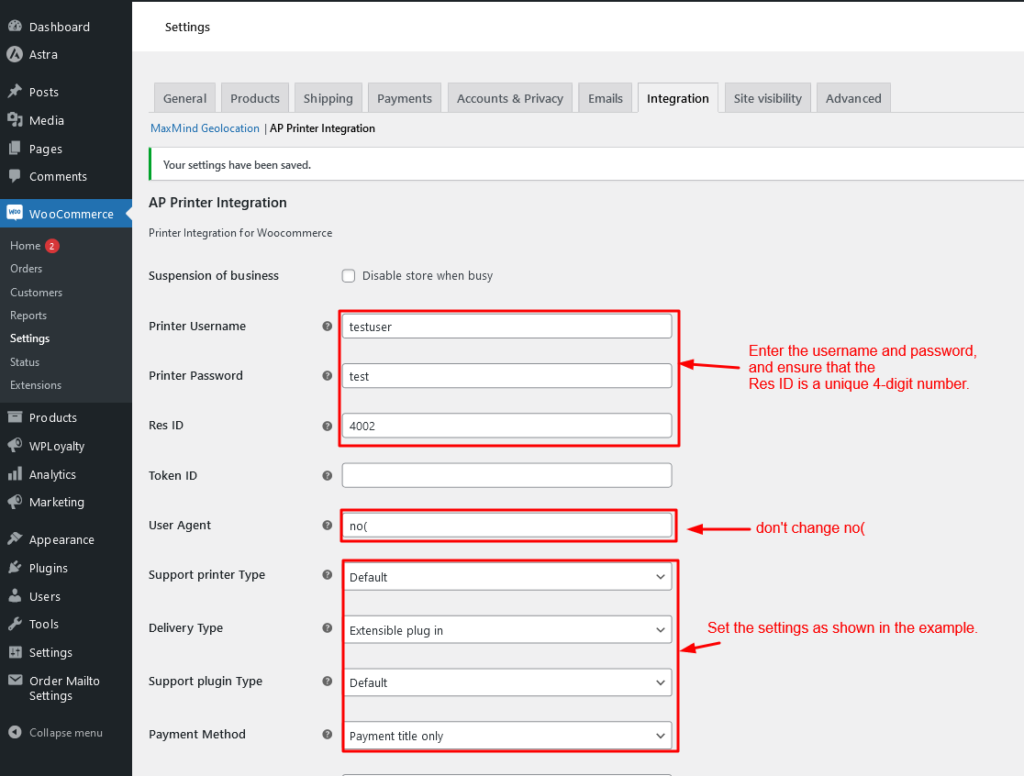
Go to WooCommerce -> Settings.
Click on the Integration tab.
Select AP Printer Integration to access the settings for Printer for WooCommerce.
Important: Configure Printer Settings
You need to enter the following information in the partner app:
Printer Username:
Printer Password:
Res ID:
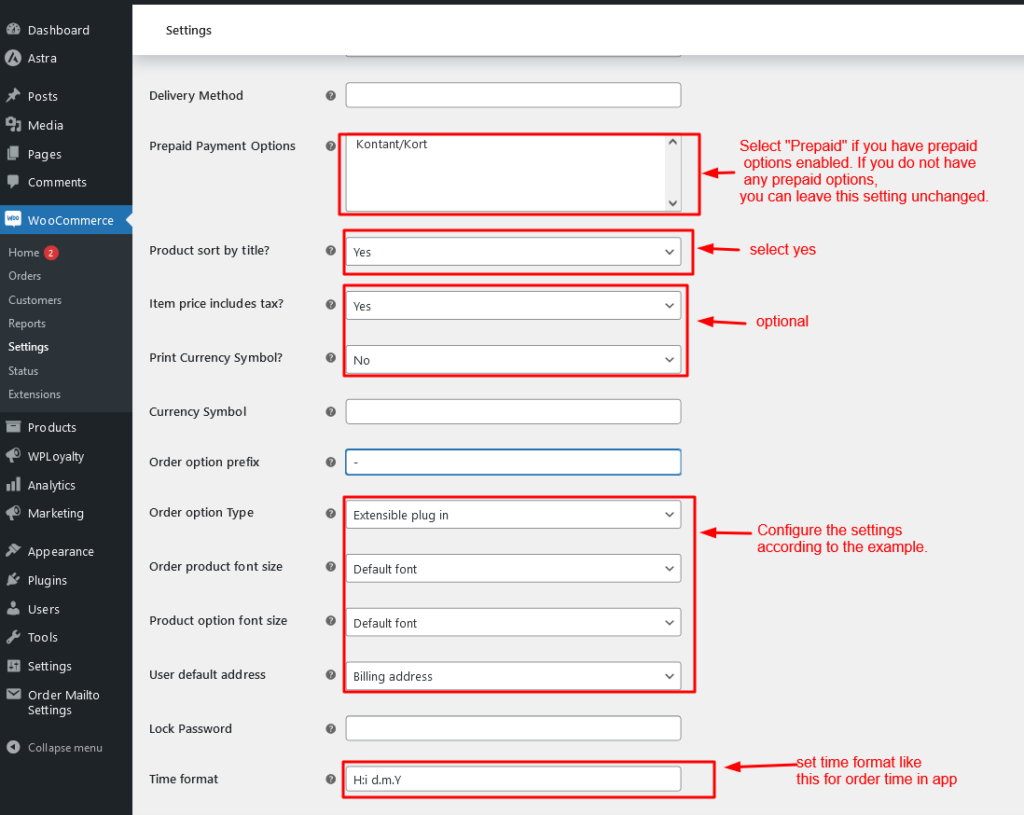
These details are crucial for connecting WooCommerce to your POS printer. Below are the settings for WooCommerce and WooCommerce Food plugins. Many of these settings are linked with order extend plugins to ensure proper functionality.
Leave it unchanged.
For server configuration in the partner app, follow the instructions in step 3 of the guide. click here